Monday 30 December 2013

Android-SharedPreference-Example

Hi Friends

       Today i am going to explain Android SharedPreferences.

Android SharedPreferences:

Android supports the usage of the SharedPreferences class for persisting key-value pairs (preferences)of primitive data types in the Android file system.
The definition of these preferences can be done via an XML resource.
The PreferenceManager class provides methods to get access to preferences stored in a certain file. 

Step to Create SharedPreference:-

1. create object of SharedPreference in following way.


SharedPreferences spref = (SharedPreferences)PreferenceManager.getDefaultSharedPreferences(this);


2. Getting value from SharedPreference:


count = spref.getInt("appcount", 0);

3. Setting new value for preference:


SharedPreferences.Editor editor = spref.edit();
       editor.putInt("appcount", count);
        editor.commit(); // Very important

Now i am going to explain shared preference with very simple example that count how many times your application open.


Java Source code for application:-


package in.androidshivendra.sharedpreferenceexample; import android.os.Bundle; import android.preference.PreferenceManager; import android.app.Activity; import android.content.SharedPreferences; import android.view.Menu; import android.widget.TextView; import android.widget.Toast; public class MainActivity extends Activity { TextView tv; SharedPreferences spref; int count ; @Override protected void onCreate(Bundle savedInstanceState) { super.onCreate(savedInstanceState); setContentView(R.layout.activity_main); spref= (SharedPreferences)PreferenceManager.getDefaultSharedPreferences(this); count = spref.getInt("appcount", 1); tv = (TextView)findViewById(R.id.textView1); tv.setText("you have "+count+"time open it"); count++; SharedPreferences.Editor editor = spref.edit(); editor.putInt("appcount", count); editor.commit(); // Very important } @Override public boolean onCreateOptionsMenu(Menu menu) { // Inflate the menu; this adds items to the action bar if it is present. getMenuInflater().inflate(R.menu.main, menu); return true; } }


Layout xml code:-

    xmlns:tools="http://schemas.android.com/tools"
    android:layout_width="match_parent"
    android:layout_height="match_parent"
    android:paddingBottom="@dimen/activity_vertical_margin"
    android:paddingLeft="@dimen/activity_horizontal_margin"
    android:paddingRight="@dimen/activity_horizontal_margin"
    android:paddingTop="@dimen/activity_vertical_margin"
    tools:context=".MainActivity" >

   
        android:layout_width="wrap_content"
        android:layout_height="wrap_content"
        android:text="@string/hello_world" />

   
        android:id="@+id/textView1"
        android:layout_width="wrap_content"
        android:layout_height="wrap_content"
        android:layout_centerHorizontal="true"
        android:layout_centerVertical="true"
        android:text="Large Text"
        android:textAppearance="?android:attr/textAppearanceLarge" />


OutPutScreen:-

You can Download complete code here


Saturday 28 December 2013

Simple-Android-PhoneGap-Example

Simple Android Phone Gap Application Example

Hi Friend
           We know that Phone Gap  provide facility to create Hybrid (cross plat form) application. In phonegap we create application using HTMLt5, CSS3 and JavaScript.
            Now i am going to explain how to create simple android phone gap exaple application using eclipse IDE.


Step 1: First of all download phonegap SDK and extract Director structure like this.


click on lib

click on andorid


Now create an android application:

                              1. create www name folder in assets folder.
                              2. create index.html file with www folder that created previously.
                              3. Copy from \phonegap-2.3.0\lib\android\ cordova-2.3.0.js file and patse in www folder.
                               4.Copy from \phonegap-2.3.0\lib\android\cordova-2.3.0.jar file and paste in project lib folder and add to build path.
                               5. Copy from \phonegap-2.3.0\lib\android\xml folder and paste it into res folder.


Now your project file directory structure look like this.


Now open your java file and write code like this:


package in.android.androidphonegapexample;

import org.apache.cordova.DroidGap;

import android.os.Bundle;

public class MainActivity extends  DroidGap {


    @Override
    public void onCreate(Bundle savedInstanceState) {
        super.onCreate(savedInstanceState);
        super.loadUrl("file:///android_asset/www/index.html");
    }


Now open your application manifest.xml file and add these code.


add these code in activity tag android:configChanges="orientation|keyboardHidden|keyboard|screenSize|locale"

Now Run Your application you got out put like this:-


You can down load complete code here


Friday 27 December 2013

Android-Phonegap-Overview

Dear Friend
         In this post i have explain  knowledge about phone-gap application using Android. It is very simple.
But first of all i want write some information about phone-gap.


1. What is phone gap?

ans: 
       phone is  an open-source mobile application development framework,that offers programmers to build applications for mobile devices using JavaScript, HTML 5, and CSS 3, instead of device-specific languages such as Objective-C


2. What are characteristic of phone gap?

ans: The phone-gap application characteristic :
        The resulting applications are hybrid, meaning that they are neither truly native (because all layout rendering is done via web views instead of the platform's native UI framework) nor purely web-based (because they are not just web apps, but are packaged as apps for distribution and have access to native device APIs).

Conclusion about Phone-gap: phone-gap facilitate us to write cross platform mobile application.


you can get knowledge about phone gap here.


you can download phone-gap SDK  here.


you can download latest phone-gap SDK here.

Thursday 26 December 2013

Splash-screen-activity-example-in-android

Simple Splash Screen Activity Example using ProgressBar

In this example i explained how to create splash screen in android.

To create Splash screen we have to use sleep method on Main Thread. i have design it and after completing activity another screen open.

To create this example you have to create two activity 1. SplashActivity ii. HomeActivity

Java Source code for splash screen :

1. SplashActivity.java:

package in.androidshivendra.projectmodel;

import android.os.Bundle;
import android.app.Activity;
import android.content.Intent;
import android.view.Menu;
import android.widget.ProgressBar;

public class SplashActivity extends Activity {
int i =0 ;
ProgressBar pb;
@Override
protected void onCreate(Bundle savedInstanceState) {
super.onCreate(savedInstanceState);
setContentView(R.layout.activity_splash);
pb  = (ProgressBar)findViewById(R.id.progressBar1);
Thread t = new Thread(new Runnable() {
@Override
public void run() {
// TODO Auto-generated method stub
for(i=0;i<=100;i++)
{
pb.setProgress(i);
try {
Thread.sleep(100);
if(i==100)
{
Intent i = new Intent();
i.setClass (SplashActivity.this,HomeActivity.class);
startActivity(i);
}
} catch (InterruptedException e) {
// TODO Auto-generated catch block
e.printStackTrace();
}
}
}
});
t.start();
}

@Override
public boolean onCreateOptionsMenu(Menu menu) {
// Inflate the menu; this adds items to the action bar if it is present.
getMenuInflater().inflate(R.menu.splash, menu);
return true;
}

@Override
protected void onPause() {
// TODO Auto-generated method stub
finish();
super.onPause();
}

}

Xml layout code:-


    xmlns:tools="http://schemas.android.com/tools"
    android:id="@+id/LinearLayout1"
    android:layout_width="match_parent"
    android:layout_height="match_parent"
    android:layout_gravity="center_horizontal"
    android:orientation="horizontal"
    android:paddingBottom="@dimen/activity_vertical_margin"
    android:paddingLeft="@dimen/activity_horizontal_margin"
    android:paddingRight="@dimen/activity_horizontal_margin"
    android:paddingTop="@dimen/activity_vertical_margin"
    tools:context=".SplashActivity" >

   
        android:layout_width="match_parent"
        android:layout_height="wrap_content"
        android:layout_gravity="center"
        android:orientation="vertical" >

       
            android:id="@+id/textView1"
            android:layout_width="wrap_content"
            android:layout_height="wrap_content"
            android:layout_gravity="center"
            android:text="Loading..." />

       
            android:id="@+id/progressBar1"
            style="?android:attr/progressBarStyleHorizontal"
            android:layout_width="match_parent"
            android:layout_height="wrap_content"
            android:layout_gravity="center" />


Monday 23 December 2013

Android-Text-to-Speech-example

Android Text to speech Example

Hi Friend
  Today we explain how to create Android Narrator.
Android provide text to speech class. using this class we can easily create an message reader type application, using the method of this class we can control speed of narrating and sound pitch also.

Java source Code for Narrator:


package in.androidshivendra.texttospeechexample;

import java.util.Locale;

import android.os.Bundle;
import android.app.Activity;
import android.speech.tts.TextToSpeech;
import android.util.Log;
import android.view.Menu;
import android.view.View;
import android.view.View.OnClickListener;
import android.widget.AdapterView;
import android.widget.AdapterView.OnItemSelectedListener;
import android.widget.ArrayAdapter;
import android.widget.Button;
import android.widget.EditText;
import android.widget.RadioButton;
import android.widget.RadioGroup;
import android.widget.RadioGroup.OnCheckedChangeListener;
import android.widget.Spinner;

public class MainActivity extends Activity implements
TextToSpeech.OnInitListener{
   String speed[] = {  "Very Slow", "Slow", "Normal", "Fast", "Very Fast"};
   Float speedf[] = {(float) 0.1,(float) 0.5,(float) 1.0,(float) 1.5,(float) 2.0};
   Spinner spspeed;
   Button btn;
   EditText emsg;
   RadioGroup rg;
   TextToSpeech tts;
@Override
protected void onCreate(Bundle savedInstanceState) {
super.onCreate(savedInstanceState);
setContentView(R.layout.activity_main);
ArrayAdapter adp = new ArrayAdapter(MainActivity.this, android.R.layout.simple_spinner_item,speed);
 
spspeed = (Spinner)findViewById(R.id.spinner1);
btn = (Button)findViewById(R.id.button1);
emsg = (EditText)findViewById(R.id.editText1);
rg = (RadioGroup)findViewById(R.id.radioGroup1);
tts = new TextToSpeech(this,this);
spspeed.setAdapter(adp);
spspeed.setOnItemSelectedListener(new OnItemSelectedListener() {

@Override
public void onItemSelected(AdapterView arg0, View arg1,
int arg2, long arg3) {
// TODO Auto-generated method stub
tts.setSpeechRate(speedf[arg2]);
}

@Override
public void onNothingSelected(AdapterView arg0) {
// TODO Auto-generated method stub
tts.setSpeechRate((float)1.0);
}
});
rg.setOnCheckedChangeListener(new OnCheckedChangeListener() {
public void onCheckedChanged(RadioGroup group, int checkedId) {
// TODO Auto-generated method stub
RadioButton rb = (RadioButton)findViewById(checkedId);
if(rb.isChecked())
{
String gen = rb.getText().toString();
if(gen.equals("Male"))
tts.setPitch(1.0f);
else
tts.setPitch(2.5f);
}
}
});
btn.setOnClickListener(new OnClickListener() {
@Override
public void onClick(View v) {
// TODO Auto-generated method stub
String text = emsg.getText().toString();
    tts.speak(text, TextToSpeech.QUEUE_FLUSH, null);
}
});
}

@Override
public boolean onCreateOptionsMenu(Menu menu) {
// Inflate the menu; this adds items to the action bar if it is present.
getMenuInflater().inflate(R.menu.main, menu);
return true;
}

@Override
public void onInit(int status) {
// TODO Auto-generated method stub
if (status == TextToSpeech.SUCCESS) {

   int result = tts.setLanguage(Locale.ENGLISH);

   if (result == TextToSpeech.LANG_MISSING_DATA
           || result == TextToSpeech.LANG_NOT_SUPPORTED) {
       Log.e("TTS", "This Language is not supported");
   } else {
    btn.setEnabled(true);
   
   }

} else {
   Log.e("TTS", "Initilization Failed!");
}
}
@Override
public void onDestroy() {
// Don't forget to shutdown tts!
if (tts != null) {
   tts.stop();
   tts.shutdown();
}
super.onDestroy();
}

}

Layout xml code:-


    xmlns:tools="http://schemas.android.com/tools"
    android:id="@+id/LinearLayout1"
    android:layout_width="match_parent"
    android:layout_height="match_parent"
    android:orientation="vertical"
    android:paddingBottom="@dimen/activity_vertical_margin"
    android:paddingLeft="@dimen/activity_horizontal_margin"
    android:paddingRight="@dimen/activity_horizontal_margin"
    android:paddingTop="@dimen/activity_vertical_margin"
    tools:context=".MainActivity" >

   
        android:id="@+id/editText1"
        android:layout_width="match_parent"
        android:layout_height="wrap_content"
        android:ems="10"
        android:inputType="textMultiLine" >


You can download Text- to - speech- example here


Android-Image-switcher-example

Image Switcher Example


Hi  Friends,
          Today i am going to explain Image Switcher example.
Image Switcher is similar to imageView but image switcher is a element of Transition Widget. so, here we display image with some animated style. In image switcher image view create at run time and if i want then we also add some animation.

Code  Discription:-


java source code:- 

package in.androidshivendraimageswitcherexample;


import android.os.Bundle;
import android.app.Activity;
import android.view.Menu;
import android.view.View;
import android.view.ViewGroup.LayoutParams;
import android.view.animation.Animation;
import android.widget.Button;

import android.widget.ImageSwitcher;
import android.widget.ImageView;
import android.widget.Toast;
import android.widget.ViewSwitcher.ViewFactory;

public class ImageSwitcherExampleActivity extends Activity implements ViewFactory{
ImageSwitcher is;
int [] imgid = {R.drawable.shivendra,R.drawable.krishna,R.drawable.madina,R.drawable.sai,R.drawable.sambhu,R.drawable.tirupati};
Button prev, next;
int count =0;
@Override
protected void onCreate(Bundle savedInstanceState) {
super.onCreate(savedInstanceState);
setContentView(R.layout.activity_image_switcher_example);
is = (ImageSwitcher)findViewById(R.id.imageSwitcher1);
prev = (Button)findViewById(R.id.button1);
next = (Button)findViewById(R.id.button2);
is.setFactory(this);
is.setInAnimation(this, android.R.anim . slide_in_left);
is.setOutAnimation(this, android.R.anim.slide_out_right);
prev.setOnClickListener(new View.OnClickListener() {
@Override
public void onClick(View v) {
// TODO Auto-generated method stub
if(count>0)
{
count--;
try{
is.setImageResource(imgid[count]);
}
catch(Exception e)
{
e.printStackTrace();
}
}
else
{
Toast.makeText(ImageSwitcherExampleActivity.this, "First Image Reached", Toast.LENGTH_LONG).show();
}
}
});
next.setOnClickListener(new View.OnClickListener() {
@Override
public void onClick(View v) {
// TODO Auto-generated method stub
if(count
{
try{
is.setImageResource(imgid[count]);
}
catch(Exception e)
{
e.printStackTrace();
}
count++;
}
else
{
Toast.makeText(ImageSwitcherExampleActivity.this, "last Image Reached", Toast.LENGTH_LONG).show();
}
}
});
}

@Override
public boolean onCreateOptionsMenu(Menu menu) {
// Inflate the menu; this adds items to the action bar if it is present.
getMenuInflater().inflate(R.menu.image_switcher_example, menu);
return true;
}

@Override
public View makeView() {
// TODO Auto-generated method stub
ImageView iv = new ImageView(this);
iv.setScaleType(ImageView.ScaleType.FIT_CENTER);
iv.setLayoutParams(new ImageSwitcher.LayoutParams(LayoutParams.FILL_PARENT, LayoutParams.FILL_PARENT));
return iv;
}

}

Layout xml code:-


    xmlns:tools="http://schemas.android.com/tools"
    android:id="@+id/LinearLayout1"
    android:layout_width="match_parent"
    android:layout_height="match_parent"
    android:orientation="vertical"
    android:paddingBottom="@dimen/activity_vertical_margin"
    android:paddingLeft="@dimen/activity_horizontal_margin"
    android:paddingRight="@dimen/activity_horizontal_margin"
    android:paddingTop="@dimen/activity_vertical_margin"
    tools:context=".ImageSwitcherExampleActivity" >

   
        android:layout_width="match_parent"
        android:layout_height="wrap_content"
        android:layout_weight="1"
        android:orientation="vertical" >

       
            android:id="@+id/imageSwitcher1"
            android:layout_width="match_parent"
            android:layout_height="match_parent" >


        android:layout_width="match_parent"
        android:layout_height="wrap_content" >


Saturday 21 December 2013

Android-Light-sensor-example

Light Sensor

Like other sensor Light Sensor is also and hardware sensor that sense light.
Today i am going to create an Tourch Application that sense light and on/off flash light.

Source code for javafile


package in.androidshivendra.tourchapplication;
import android.app.Activity;
import android.app.AlertDialog;
import android.content.DialogInterface;
import android.content.pm.PackageManager;
import android.hardware.Camera;
import android.hardware.Camera.Parameters;
import android.hardware.Sensor;
import android.hardware.SensorEvent;
import android.hardware.SensorEventListener;
import android.hardware.SensorManager;
import android.media.MediaPlayer;
//import android.media.MediaPlayer.OnCompletionListener;
import android.os.Bundle;
import android.util.Log;
import android.widget.Toast;
//import android.view.View;
//import android.widget.ImageButton;

public class MainActivity extends Activity implements SensorEventListener {

SensorManager smgr;
Sensor msensor;

    private Camera camera;
    private boolean isFlashOn;
    private boolean hasFlash;
    Parameters params;

    @Override
    protected void onCreate(Bundle savedInstanceState) {
        super.onCreate(savedInstanceState);
        setContentView(R.layout.activity_main);

        //code for sensor
     
        smgr = (SensorManager)getSystemService(SENSOR_SERVICE);
        msensor = smgr.getDefaultSensor(Sensor.TYPE_LIGHT);


        // First check if device is supporting flashlight or not      
        hasFlash = getApplicationContext().getPackageManager()
                .hasSystemFeature(PackageManager.FEATURE_CAMERA_FLASH);

        if (!hasFlash) {
            // device doesn't support flash
            // Show alert message and close the application
            AlertDialog alert = new AlertDialog.Builder(MainActivity.this)
                    .create();
            alert.setTitle("Error");
            alert.setMessage("Sorry, your device doesn't support flash light!");
            alert.setButton("OK", new DialogInterface.OnClickListener() {
                public void onClick(DialogInterface dialog, int which) {
                    // closing the application
                    finish();
                }
            });
            alert.show();
            return;
        }

        // get the camera
        getCamera();
       
   
    }

   
    // Get the camera
    private void getCamera() {
        if (camera == null) {
            try {
                camera = Camera.open();
                params = camera.getParameters();
            } catch (RuntimeException e) {
                Log.e("Camera Error. Failed to Open. Error: ", e.getMessage());
            }
        }
    }

   
     // Turning On flash
    private void turnOnFlash() {
        if (!isFlashOn) {
            if (camera == null || params == null) {
                return;
            }

           
            params = camera.getParameters();
            params.setFlashMode(Parameters.FLASH_MODE_TORCH);
            camera.setParameters(params);
            camera.startPreview();
            isFlashOn = true;


        }

    }


    // Turning Off flash
    private void turnOffFlash() {
        if (isFlashOn) {
            if (camera == null || params == null) {
                return;
            }
     
           
            params = camera.getParameters();
            params.setFlashMode(Parameters.FLASH_MODE_OFF);
            camera.setParameters(params);
            camera.stopPreview();
            isFlashOn = false;
           
         
        }
    }
   

    @Override
    protected void onDestroy() {
        super.onDestroy();
    }

    @Override
    protected void onPause() {
        super.onPause();
       
        // on pause turn off the flash
        smgr.unregisterListener(this);


    }

    @Override
    protected void onRestart() {
        super.onRestart();
    }

    @Override
    protected void onResume() {
        super.onResume();
       
        // on resume turn on the flash
        smgr.registerListener(this, msensor, SensorManager.SENSOR_DELAY_NORMAL);
 
    }

    @Override
    protected void onStart() {
        super.onStart();
       
        // on starting the app get the camera params
        getCamera();
    }

    @Override
    protected void onStop() {
        super.onStop();
       
        // on stop release the camera
        if (camera != null) {
            camera.release();
            camera = null;
        }
    }


@Override
public void onAccuracyChanged(Sensor sensor, int accuracy) {
// TODO Auto-generated method stub

}


@Override
public void onSensorChanged(SensorEvent event) {
// TODO Auto-generated method stub

if (event.values[0]<5 .0="" p=""> {


                 // turn on flash
                 turnOnFlash();
         
}
else
{
turnOffFlash();
}
}

}


Required Permission

uses-feature android:name="android.hardware.camera"
uses-permission android:name="android.permission.CAMERA"


Note:

This application only test on Real Device.


Saturday 14 December 2013

Android Upload Image

Android Upload Image

Hi Friend
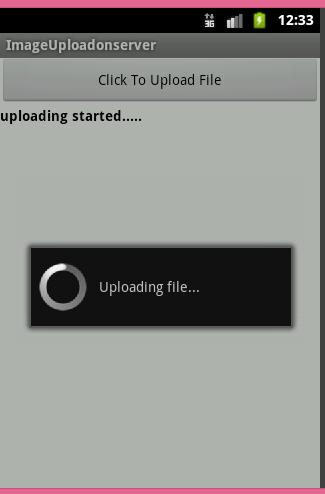
       Today i am going to explain how to upload image on application server using android.
There are two part for creating such type application.
1. Server part
2.android application creation

Server Part :

To work with Application Server you required knowledge about server programming language (like jsp, php, Asp etc). i have used PHP script.

Step 1:
         Open any text editor and write php script code that written below and save with index.php and also create a folder named uploads location C:\xampp\htdocs\

    $file_path = "uploads/";
   
    $file_path = $file_path . basename( $_FILES['uploaded_file']['name']);
    if(move_uploaded_file($_FILES['uploaded_file']['tmp_name'], $file_path)) {
        echo "success";
    } else{
        echo "fail";
    }
 ?>

Android Application creation

Step 2:
        Create an android applcation.
     android:orientation="vertical"
     android:layout_width="fill_parent"
     android:layout_height="fill_parent"
     >


Now we are going to create .java file


package in.androidshivendra.fileupload;
import java.io.DataOutputStream;
import java.io.File;
import java.io.FileInputStream;
import java.net.HttpURLConnection;
import java.net.MalformedURLException;
import java.net.URL;


import android.app.Activity;
import android.app.ProgressDialog;
import android.os.Bundle;
import android.util.Log;
import android.view.View;
import android.view.View.OnClickListener;
import android.widget.Button;
import android.widget.TextView;
import android.widget.Toast;

public class UploadToServer extends Activity {
   
    TextView messageText;
    Button uploadButton;
    int serverResponseCode = 0;
    ProgressDialog dialog = null;
     
    String upLoadServerUri = null;
   
    /**********  File Path *************/
    final String uploadFilePath = "/mnt/sdcard/";
    final String uploadFileName = "a.jpg";
   
    @Override
    public void onCreate(Bundle savedInstanceState) {
       
        super.onCreate(savedInstanceState);
        setContentView(R.layout.activity_upload_to_server);
       
        uploadButton = (Button)findViewById(R.id.uploadButton);
        messageText  = (TextView)findViewById(R.id.messageText);
       
        messageText.setText("Uploading file path :- '/mnt/sdcard/"+uploadFileName+"'");
       
        /************* Php script path ****************/
        upLoadServerUri = "http://10.0.2.2/index.php";
// here 10.0.2.2 is url for local server when you run on emulator.
       
        uploadButton.setOnClickListener(new OnClickListener() {          
            @Override
            public void onClick(View v) {
               
                dialog = ProgressDialog.show(UploadToServer.this, "", "Uploading file...", true);
               
                new Thread(new Runnable() {
                        public void run() {
                             runOnUiThread(new Runnable() {
                                    public void run() {
                                        messageText.setText("uploading started.....");
                                    }
                                });                    
                         
                             uploadFile(uploadFilePath + "" + uploadFileName);
                                                   
                        }
                      }).start();      
                }
            });
    }
   
    public int uploadFile(String sourceFileUri) {
         
         
          String fileName = sourceFileUri;

          HttpURLConnection conn = null;
          DataOutputStream dos = null;
          String lineEnd = "\r\n";
          String twoHyphens = "--";
          String boundary = "*****";
          int bytesRead, bytesAvailable, bufferSize;
          byte[] buffer;
          int maxBufferSize = 1 * 1024 * 1024;
          File sourceFile = new File(sourceFileUri);
         
          if (!sourceFile.isFile()) {
             
               dialog.dismiss();
             
               Log.e("uploadFile", "Source File not exist :"
                                   +uploadFilePath + "" + uploadFileName);
             
               runOnUiThread(new Runnable() {
                   public void run() {
                       messageText.setText("Source File not exist :"
                               +uploadFilePath + "" + uploadFileName);
                   }
               });
             
               return 0;
         
          }
          else
          {
               try {
                 
                     // open a URL connection to the Servlet
                   FileInputStream fileInputStream = new FileInputStream(sourceFile);
                   URL url = new URL(upLoadServerUri);
                 
                   // Open a HTTP  connection to  the URL
                   conn = (HttpURLConnection) url.openConnection();
                   conn.setDoInput(true); // Allow Inputs
                   conn.setDoOutput(true); // Allow Outputs
                   conn.setUseCaches(false); // Don't use a Cached Copy
                   conn.setRequestMethod("POST");
                   conn.setRequestProperty("Connection", "Keep-Alive");
                   conn.setRequestProperty("ENCTYPE", "multipart/form-data");
                   conn.setRequestProperty("Content-Type", "multipart/form-data;boundary=" + boundary);
                   conn.setRequestProperty("uploaded_file", fileName);
                 
                   dos = new DataOutputStream(conn.getOutputStream());
       
                   dos.writeBytes(twoHyphens + boundary + lineEnd);
                   dos.writeBytes("Content-Disposition: form-data; name=uploaded_file;filename="+ fileName + "" + lineEnd);
                 
                   dos.writeBytes(lineEnd);
       
                   // create a buffer of  maximum size
                   bytesAvailable = fileInputStream.available();
       
                   bufferSize = Math.min(bytesAvailable, maxBufferSize);
                   buffer = new byte[bufferSize];
       
                   // read file and write it into form...
                   bytesRead = fileInputStream.read(buffer, 0, bufferSize);
                   
                   while (bytesRead > 0) {
                     
                     dos.write(buffer, 0, bufferSize);
                     bytesAvailable = fileInputStream.available();
                     bufferSize = Math.min(bytesAvailable, maxBufferSize);
                     bytesRead = fileInputStream.read(buffer, 0, bufferSize);
                   
                    }
       
                   // send multipart form data necesssary after file data...
                   dos.writeBytes(lineEnd);
                   dos.writeBytes(twoHyphens + boundary + twoHyphens + lineEnd);
       
                   // Responses from the server (code and message)
                   serverResponseCode = conn.getResponseCode();
                   String serverResponseMessage = conn.getResponseMessage();
                   
                   Log.i("uploadFile", "HTTP Response is : "
                           + serverResponseMessage + ": " + serverResponseCode);
                 
                   if(serverResponseCode == 200){
                     
                       runOnUiThread(new Runnable() {
                            public void run() {
                               
                                String msg = "File Upload Completed.\n\n See uploaded file here : \n\n"
                                              +" http://www.androidtrainer.netne.net.com/uploads/"
                                              +uploadFileName;
                               
                                messageText.setText(msg);
                                Toast.makeText(UploadToServer.this, "File Upload Complete.",
                                             Toast.LENGTH_SHORT).show();
                            }
                        });              
                   }  
                 
                   //close the streams //
                   fileInputStream.close();
                   dos.flush();
                   dos.close();
                   
              } catch (MalformedURLException ex) {
                 
                  dialog.dismiss();
                  ex.printStackTrace();
                 
                  runOnUiThread(new Runnable() {
                      public void run() {
                          messageText.setText("MalformedURLException Exception : check script url.");
                          Toast.makeText(UploadToServer.this, "MalformedURLException",
                                                              Toast.LENGTH_SHORT).show();
                      }
                  });
                 
                  Log.e("Upload file to server", "error: " + ex.getMessage(), ex);
              } catch (Exception e) {
                 
                  dialog.dismiss();
                  e.printStackTrace();
                 
                  runOnUiThread(new Runnable() {
                      public void run() {
                          messageText.setText("Got Exception : see logcat ");
                          Toast.makeText(UploadToServer.this, "Got Exception : see logcat ",
                                  Toast.LENGTH_SHORT).show();
                      }
                  });
                  Log.e("Upload file to server Exception", "Exception : "
                                                   + e.getMessage(), e);
              }
              dialog.dismiss();    
              return serverResponseCode;
             
           } // End else block
         }
}

Required Permission are:


i.   android.permission.READ_EXTERNAL_STORAGE
ii. android.permission.INTERNET

To run this example you have to put an image file name a.jpg  in sdcard.

Step 3: Send image in emulator sdcard.

 i. start emulator and open file explorer by this way:-

ii. click on windows-> showview-> other-> android-> fileexplorer

iii. you got window like this


Now Run Application :-


Image Upload Process start

Image Uploading complete.


Basically your file is store in C:\xampp\htdocs\uploads folder


NOTE: THIS APPLICATION ONLY RUN WITH EMULATOR, to test this application on phone or blue stack then you have to chage Image path.
final String uploadFilePath = "/mnt/sdcard/";
    final String uploadFileName = "a.jpg";
according to current file location.


Today's Pageviews